
Blogging is an essential part of online communication, and luckily, creating your blog website has never been easier. With Cloudways and WordPress, you can create a stunning blog without being a tech genius.
In this guide, we’ll take you through the process of setting up a blog with Cloudways and WordPress. To begin, we’ll show you how to sign up for Cloudways and connect your domain. After that, we’ll secure your website with SSL and connect WordPress to your Cloudways account. Finally, we’ll discuss how to customize your blog with themes and plugins.
By the end of this guide, you’ll be equipped with all the knowledge you need to create your blog website with Cloudways and WordPress. So, let’s dive in!
Further Reading : Cloud Hosting: Why Cloudways Is The Best Choice?
內容目錄
Registering with Cloudways
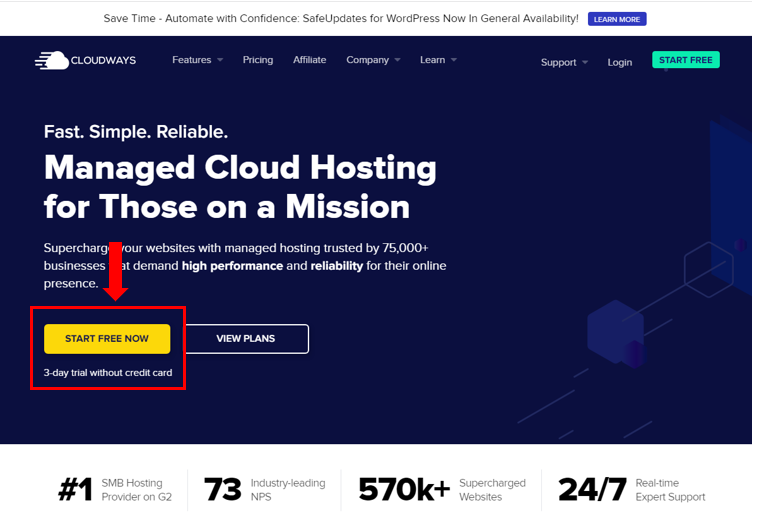
To create a blog website with Cloudways and WordPress, you need to register for a Cloudways account. Don’t worry, the registration process is straightforward and easy to follow.
First, head to the Cloudways website and click on the “Start Free” button. From there, fill out your name, email address, and create a password for your account.
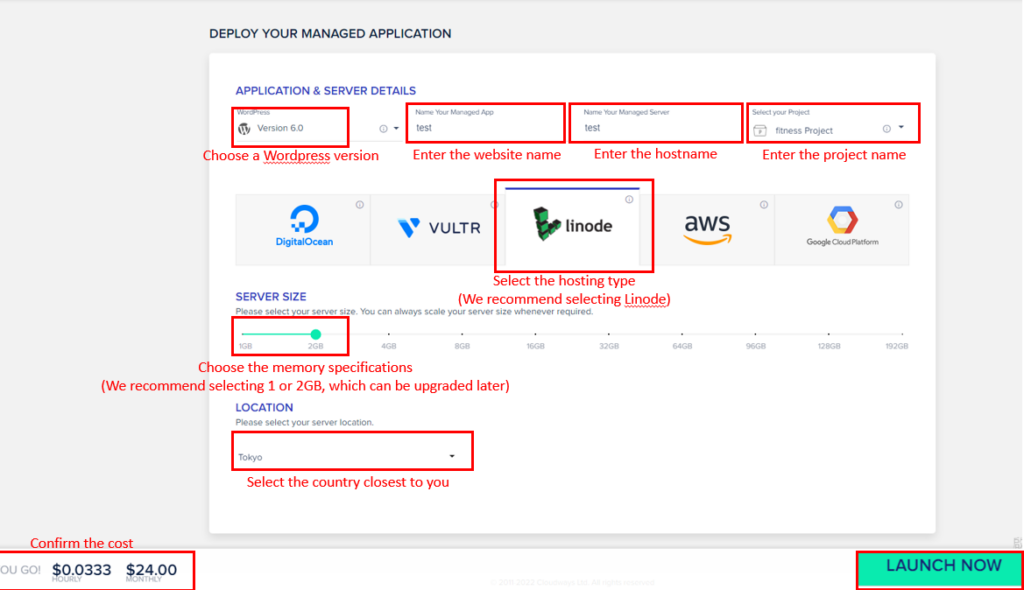
Next, choose your preferred cloud provider, such as Amazon Web Services or DigitalOcean.
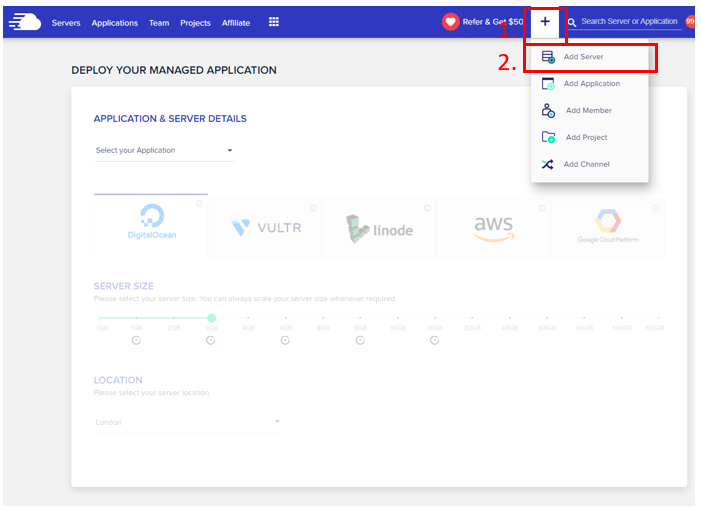
Then, select your server size and location, and proceed to the next step.
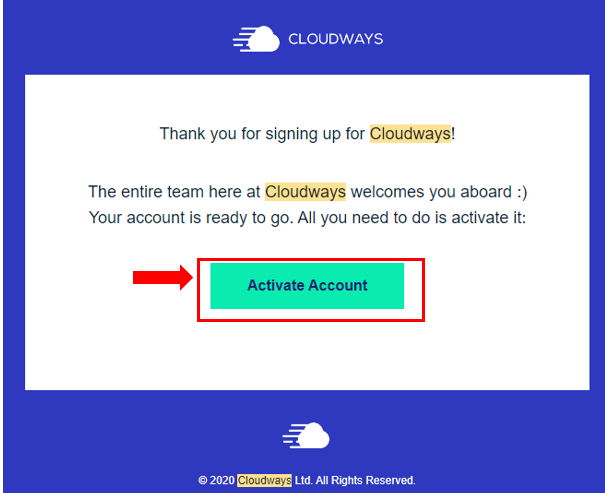
Once you’ve completed the registration, you’ll receive a confirmation email with instructions on how to access your account. Congratulations, you’re now registered with Cloudways and ready to start creating your blog website!
In the next section, we’ll show you how to connect your domain to your Cloudways account. So, let’s move on!
Further Reading : No Coding Required:Build A Blog Website Now
Connecting Your Domain
Now that you’ve registered with Cloudways, it’s time to connect your domain to your account. This step is essential to ensure that visitors can find your website online.
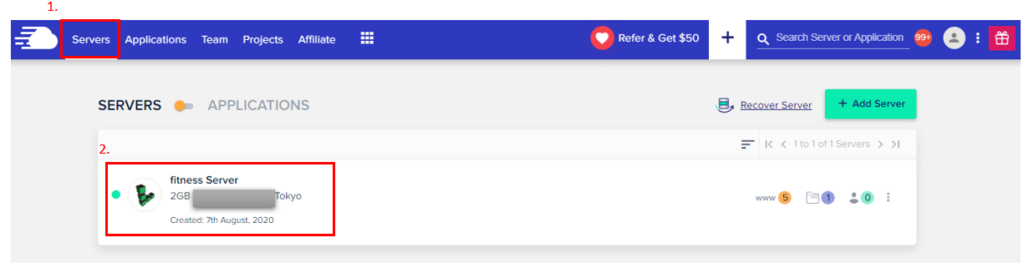
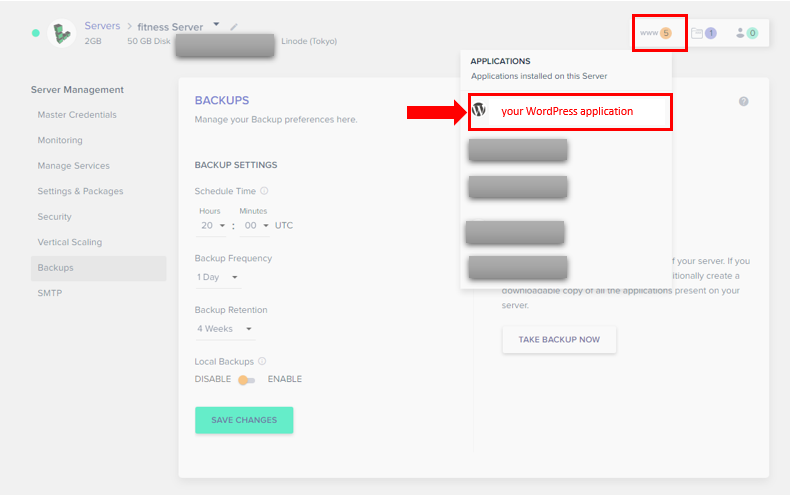
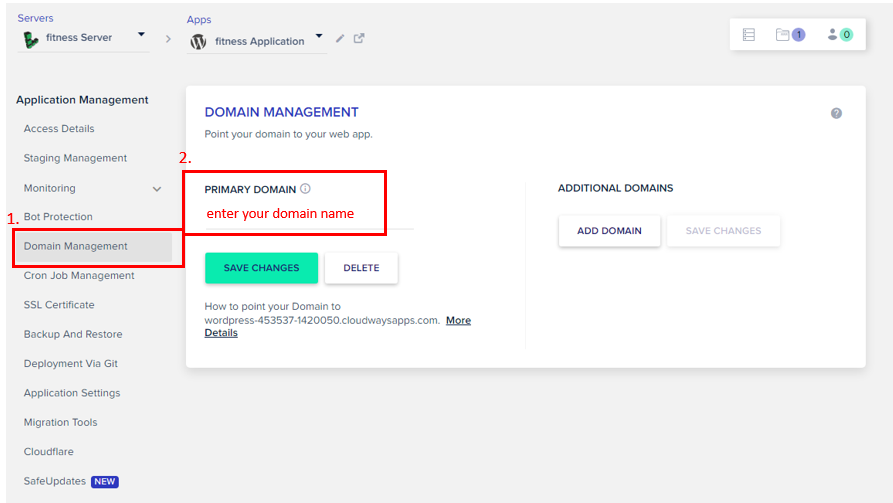
First, log in to your Cloudways account, and go to the “Applications” tab. Select your WordPress application, and click on the “Domain Management” option.
Next, enter your domain name and click on the “SAVE CHANGES” button
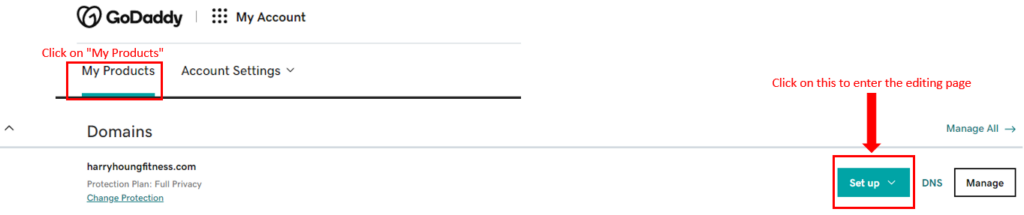
After that, you need to update your domain’s DNS records to point to your Cloudways server. This process may vary depending on your domain registrar, but typically involves adding an A record or CNAME record.
The recommended domain provider is GoDaddy, and I am using GoDaddy as an example here as well
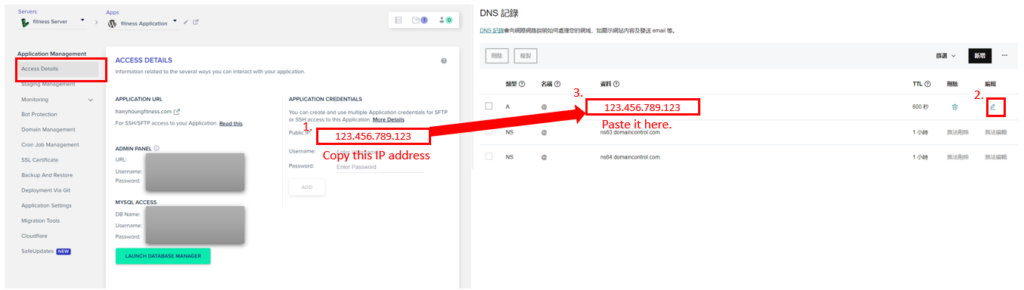
Once you’ve updated your DNS records, it may take some time for the changes to propagate. This process can take up to 24 hours, so be patient.
Congratulations, you’ve now connected your domain to your Cloudways account! In the next section, we’ll show you how to secure your website with SSL. So, let’s move on!
Securing Your Website with SSL
SSL (Secure Sockets Layer) is a security protocol that encrypts data between a web server and a web browser. By installing an SSL certificate on your website, you can ensure that all data transmitted between your website and its visitors is secure.
To install an SSL certificate on your Cloudways server, first go to the “SSL Certificates” tab in your Cloudways account.Then, click on the “Domain Management” option. enter your domain you want to secure.
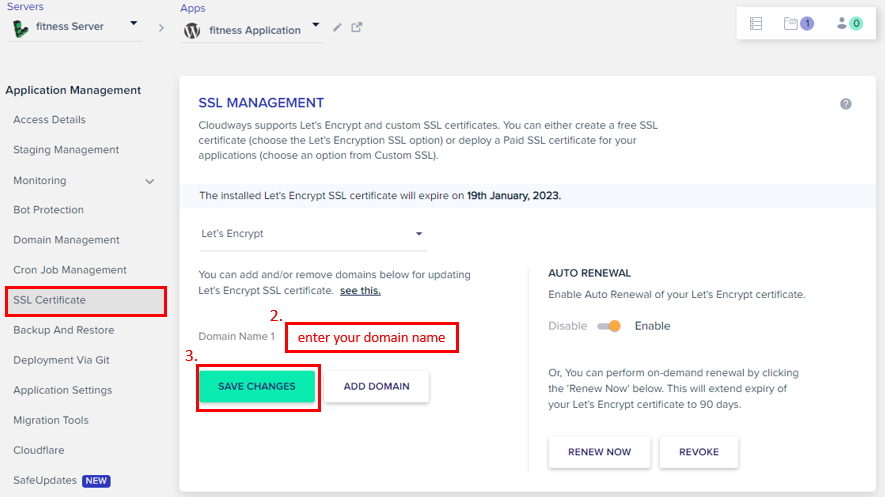
Finally, click on the “Save” button to secure your website with SSL. It may take a few minutes for the changes to take effect, but once they do, your visitors will be able to browse your website securely.
Congratulations, you’ve now secured your website with SSL!
Customizing Your Blog
Firstly, follow the image below to access your website’s backend.
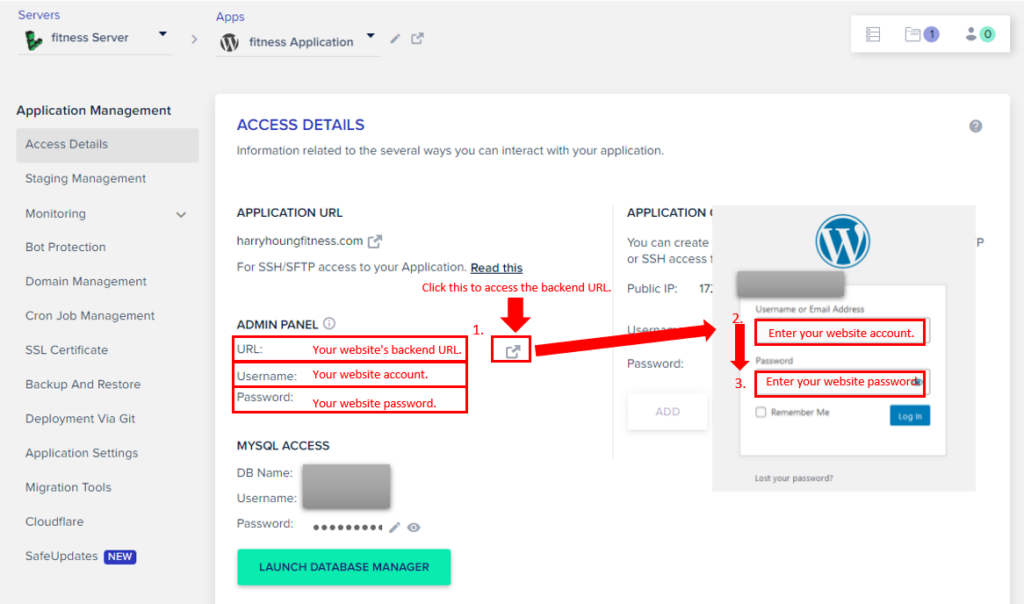
Then, follow the steps below to build your own exclusive website
- Choose a Theme: Pick a design that fits your blog’s style and content.
- Install Plugins: Add functionality to your blog with plugins for SEO, social media, and more.
- Customize Site Settings: Adjust site settings to optimize for speed, security, and user experience.
- Create Pages and Posts: Start creating content for your blog with pages and posts.
- Brand Your Blog: Add your own branding elements to make your blog stand out.
- Preview and Test: Preview your blog to make sure everything looks and functions as expected.
- Launch Your Blog: Launch your blog and start sharing your content with the world!
Further Reading : What Is Affiliate Marketing?How To Make Money While You Sleep!
Conclusion
Congratulations on creating your own blog with Cloudways and WordPress!
With just a few easy steps, you’ve taken the first step towards establishing your online presence.
Keep exploring WordPress and Cloudways to discover new ways to customize and improve your blog.
Remember, with the power of the cloud, the sky’s the limit!